
How Does 3D Printing Work?
1. 3D Modeling Software
Modeling is the first step of 3D printing. Manufacturing companies typically design object models using a special type of computer software known as a computer-aided design (CAD) package. Once complete, the object model is saved as a stereolithography (STL) or an additive manufacturing file (AMF) format.

2. Slicing the Model
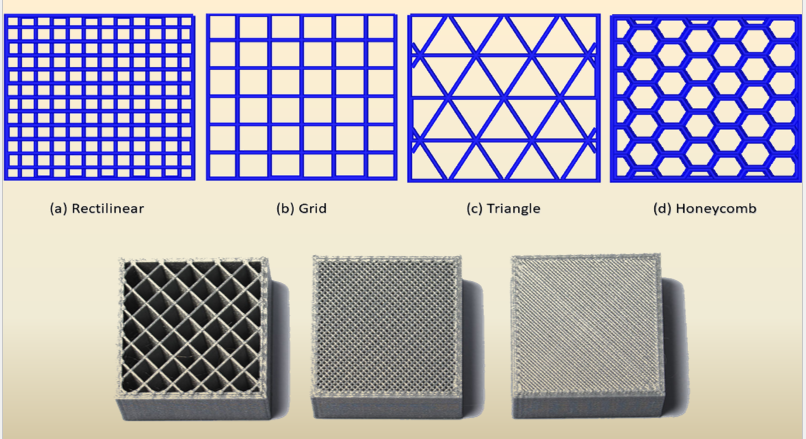
Once a model is created, it’s time to “slice” it. Since 3D printers cannot conceptualize the concept of three dimensions, like humans, engineers need to slice the model into layers in order for the printer to create the final product. Slicing software takes scans of each layer of a model and will tell the printer how to move in order to recreate that layer. Slicers also tell 3D printers where to “fill” a model. This fill gives a 3D printed object internal lattices and columns that help shape and strengthen the object. Once the model is sliced, it’s sent off to the 3D printer for the actual printing process. Slicing the Model.


3. 3D Printing Process
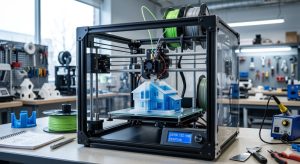
When the modelling and slicing of a 3D object is completed, it’s time for the 3D printer to finally take over.

Post-Processing or Finishing of 3D printed parts
Process Parameters


At its core, 3D printing—also known as additive manufacturing—is the process of creating a three-dimensional object from a digital file. Instead of cutting material away (like carving wood or machining metal), a 3D printer builds the object layer by layer, from the bottom up.
Here is a step-by-step breakdown of how the entire process works, from a concept on a screen to a physical object in your hand.
1. The Digital Foundation: 3D Modeling
Every 3D print starts as a digital blueprint. You can’t have a physical object without a virtual one first.
- CAD Software: Designers use Computer-Aided Design (CAD) software to create a 3D model from scratch.
- 3D Scanning: Alternatively, you can use a 3D scanner to digitally capture a real-world object and replicate its geometry.
- The File Format: Once the model is ready, it is usually exported as an STL (Stereolithography) or 3MF file, which describes the surface geometry of the object.
2. Translating to Machine Code: Slicing
A 3D printer isn’t smart enough to look at a 3D model and know what to do; it needs instructions. This is where a piece of software called a slicer comes in.
The slicer takes the 3D model and literally cuts it into hundreds or thousands of horizontal, paper-thin layers. It then translates these layers into G-code, which is the language the printer understands. The G-code contains precise commands telling the printer:
- Where to move the print head (X, Y, and Z coordinates).
- How fast to move.
- How much material to deposit or melt.
3. The Printing Phase: Layer-by-Layer Construction
Once the G-code is fed into the printer, the actual building begins. While there are many different types of 3D printing technologies, they all share the same fundamental “additive” approach.
Here are the three most common methods used today:
A. Fused Deposition Modeling (FDM)
This is the most common and recognizable type of 3D printing, often used in hobbyist desktop printers.
- How it works: It works much like a high-tech hot glue gun. A solid plastic string (filament) is pushed into a heated nozzle, where it melts. The nozzle moves around a build plate, extruding the melted plastic in precise lines to form a layer. The plastic cools and hardens almost instantly. The build plate then moves down slightly (or the nozzle moves up), and the next layer is printed on top of the last.
[Image diagram of Fused Deposition Modeling FDM 3D printer mechanism with filament extrusion nozzle]
B. Stereolithography (SLA)
SLA is a resin-based technology known for producing incredibly high-detail objects with smooth surfaces.
- How it works: Instead of melting plastic, SLA uses a vat of liquid photopolymer resin. An ultraviolet (UV) laser beams down into the resin, tracing the shape of the layer. The UV light causes the liquid resin to instantly cure and solidify. The build platform lifts up, fresh liquid flows underneath, and the laser cures the next layer.
C. Selective Laser Sintering (SLS)
Commonly used in industrial manufacturing, SLS creates highly durable, complex parts.
- How it works: The printer spreads a thin layer of powdered material (usually nylon) across the build platform. A high-powered laser then traces the layer, heating the powder just enough to fuse (sinter) the particles together without melting them completely. A new layer of powder is swept over the top, and the process repeats. The unused powder acts as a natural support structure for the object as it prints.
4. Post-Processing
Once the printing is complete, the object is rarely ready to use straight out of the machine. Depending on the method used, it usually requires some finishing touches:
- Support Removal: For FDM and SLA prints, temporary “support structures” are often printed to hold up overhanging parts of the model (like the arms of a statue). These must be broken or dissolved away.
- Curing: SLA resin prints need a final bath in UV light to fully harden.
- Sanding and Painting: To achieve a polished look, objects might be sanded down, primed, and painted.
3D printing works by building an object layer by layer from the bottom up using a digital blueprint. Unlike traditional manufacturing that carves away material (subtractive manufacturing), 3D printing is an additive manufacturing process. It adds material exactly where it is needed, resulting in very little waste.
Here is a breakdown of how a digital concept transforms into a physical object.
Step 1: The Digital Blueprint
Every 3D print starts on a computer.
- Design: A user creates a 3D digital model using Computer-Aided Design (CAD) software or generates one using a 3D scanner.
- File Export: The model is saved as a 3D-readable file, typically an STL, OBJ, or 3MF format.
Step 2: Slicing the Model
The digital file cannot be read by the printer directly. It must go through “slicing” software (like Cura or Prusa Slicer).
- Layering: The software cuts the virtual 3D model into thousands of thin, horizontal 2D layers
- Internal Structures: The slicer automatically designs internal stability structures, like a hollow lattice grid, to keep the object lightweight but structurally strong.
- Supports: Temporary columns or scaffolding are added to support overhanging parts so they do not collapse during printing.
- G-Code Generation: The slicer translates all of this data into G-code, a numeric language containing precise X, Y, and Z coordinate paths that tell the printer where to move and when to deposit material.
Step 3: The Physical Printing Process
Once the G-code is sent to the printer, the physical creation begins. While there are many styles of 3D printers, the most common everyday type is Fused Deposition Modeling (FDM), which acts like a highly precise robotic hot-glue gun.
- Heating: The printer warms up its build plate and its extrusion nozzle to precise, high temperatures.
- Feeding Material: A thin plastic string, known as filament (usually PLA or ABS), is fed into the print tool head.
- Layer Deposition: The heated nozzle melts the plastic and extrudes it onto the build plate, tracing the exact cross-section path dictated by the first layer of the G-code. [1, 2]
- Bonding: The plastic cools and hardens almost instantly. The build plate then lowers slightly (or the print head rises), and the machine deposits the next layer directly on top, fusing the layers together. This repeat cycle can take anywhere from a few hours to days depending on the object’s complexity.
🛠️ Step 4: Post-Processing
Once the print finishes, it usually requires a few final touches before it can be used:
- Support Removal: Any temporary structural columns are broken or snapped off.
- Finishing: The object may be sanded, polished, or painted to smooth out visible layer lines.

https://shorturl.fm/ebDbu